It is peak hunting season, and you have just bagged yourself a twelve-point buck. There’s a big smile on your face. After all, you have just harvested 30 to 50 pounds of lean meat. There’s only one problem your 30 pounds of meat is stuck behind a wall of hide and bone. For this you’ll need to know how to field dress a deer.
To retrieve your lean meat, you will have to get your hands dirty. Which, means it is time to field dress your kill. For those of you not in the know, field dressing entails the removal of a dead animal’s internal organ. This is done to preserve the meat and cool the carcass.
Now the first thing you need to know about how to field dress a deer is that the process can be messy. With that being said lets dive right into the nitty-gritties of how to gut a deer. But first, let us look at what you need to know on how to field dress a whitetail deer.
Before The Field Dressing Of A Deer
Type Of Wound
Now different people hunt using different weapons. There are those that use compound bows or the crossbow and there are those that us guns. If you use a compound bow one of the things you will need to factor in is the broadhead.
It is important that you retrieve your mechanical broadhead/fixed before field dressing your kill. If for one reason or the other this is not possible you will need to be extra careful when gutting the deer.
State Hunting Laws
As you already know different states have different hunting laws. That being the case, in some states, it is required that an animals sex organs remain naturally attached. This is done as evidence of the animal’s sex and applies mostly to mature bucks.
Now not all states have this regulation, and you will need to be familiar with some of these laws. In particular for those of you who want to learn how to field dress a buck deer.
How long to wait
How long can you wait to field dress a deer? This is a question I have encountered a number of times. Ideally, you should field dress your deer immediately after its dead. The rationale for this is that dead deer begins to rot as soon as it’s dead.
Also, according to USDA guidelines meat should be refrigerated within two hours. As such, you have two hours to complete the whole field dressing process. The carcass should not be kept exposed outside for too long as this can give bacteria time to infest.
Temperatures of between 40 and 140 degrees Fahrenheit are dangerous for freshly killed carcasses. If you are hunting during winter at night, you might have until daybreak to field dress the deer.
How To Field Dress A Deer
Now let’s get right into how to process a deer. Below are instructions on how to field dress a deer step by step. These are based on my own personal preferences. And the process might differ from how someone else does it.
Step One: Prepare Your Gear
All you need to field dress a deer is a sharp field dressing knife and a strong stomach. Though having latex gloves on is a good idea. And so is being armed with a gut hook tool. Also before slicing your kill open make sure you do not have your watch or any other piece of jewelry on.
Step Two: Position The Deer
Place the deer on its back preferably on a hilly or slopping area with the head pointing uphill. This is especially when dealing with a limber or freshly killed buck. Now you will need to do some cleaning afterward. So it helps to do this near a stream or any other water source.
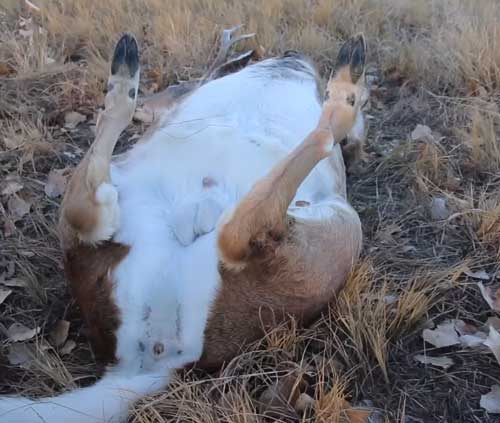
Step Three: Start Slicing
Different hunters have different approaches when it comes to gutting their kill. Some prefer splitting the pelvis to get access to the rectal tract. However, personally, I prefer cutting around the anus first.
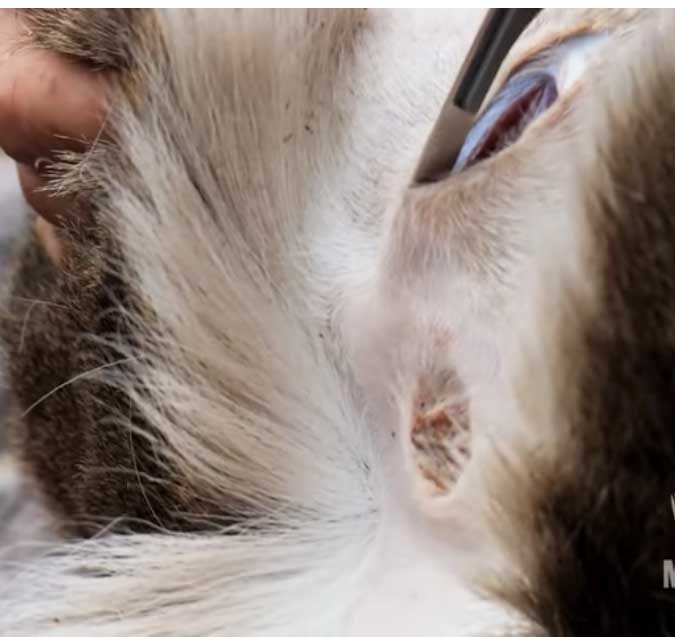
How I do it is cut a small hole around the anus about three to four inches deep. This is similar to coring an apple. Be very careful not to puncture the colon. It won’t ruin your meat but will give it a rather unpleasant flavor.
Next slide the knife deeper into the pelvic canal and slice the attached membranes. Do this to free up the last few inches of colon.
Step Four: Start The Cut
Again different people have different approaches on how to how to field dress a whitetail deer particularly in regards to making the first cut. All the same, what myself I do is grab the skin where it forms a “V” between the rear legs.
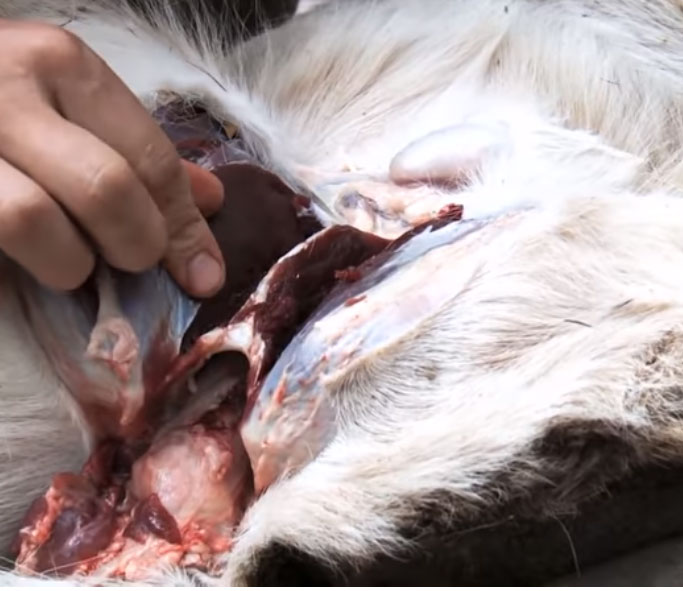
If it’s a doe, this will be just below the milk sac. On the other hand, if you are dealing with a buck, it will be just below its testicles. Next cut a shallow slit about one inch deep and remove the genitalia if it’s a buck.
Step Five: Cut Open
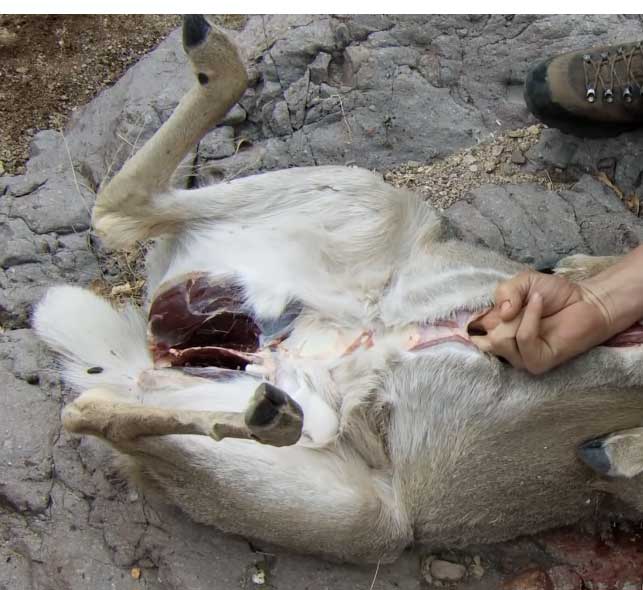
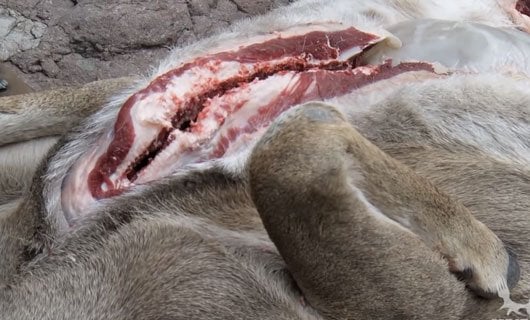
Here is where the gut hook we talked about earlier comes in handy. Using your first incision as a starting point open the belly of the deer from the pelvic bone to the breastbone. Then cut through the sternum with the blade until you reach the neck.

Step Six: Cut The Diaphragm
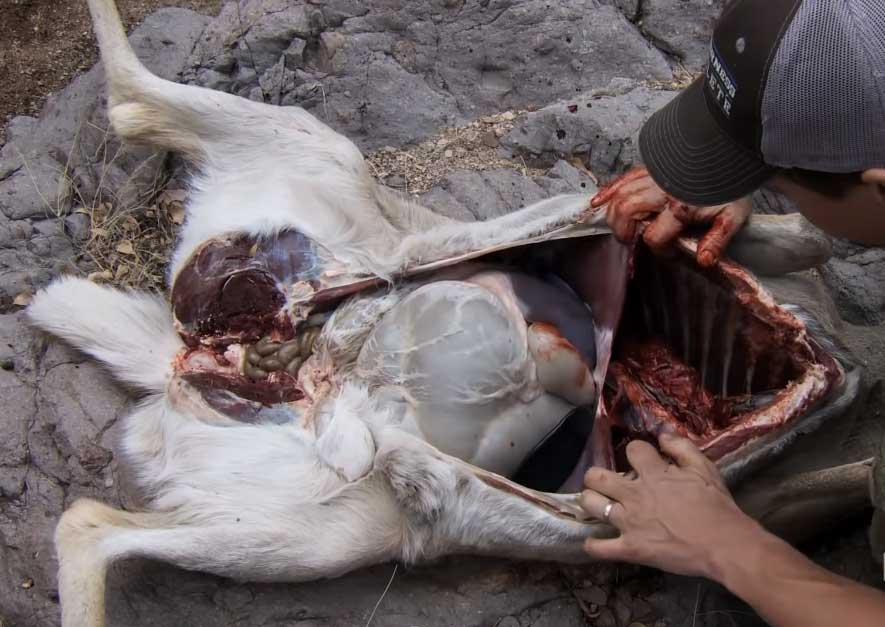
Separating the chest cavity and the abdomen is a thin membrane known as the diaphragm, which I am sure you learned about in science class. To get to the chest cavity organs, you must cut this membrane. Cut it from the cavity’s wall and work you wall to the spine.
Step Seven: Cut The Windpipe
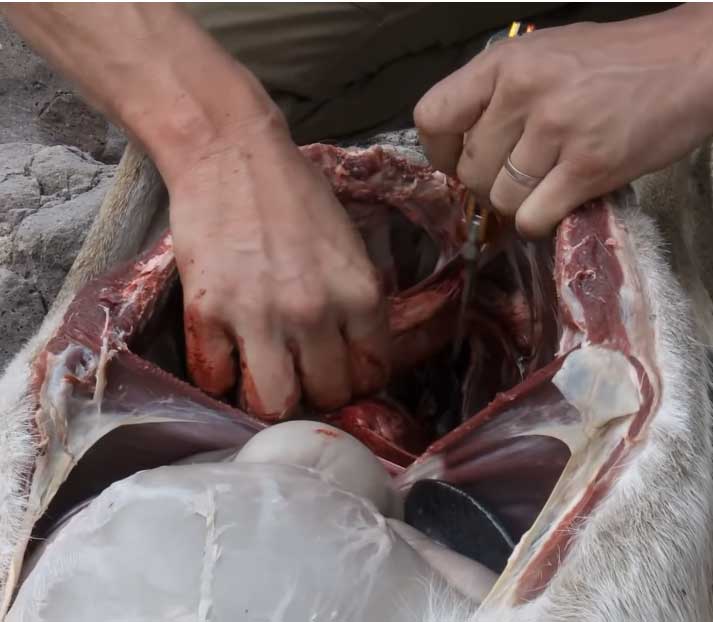
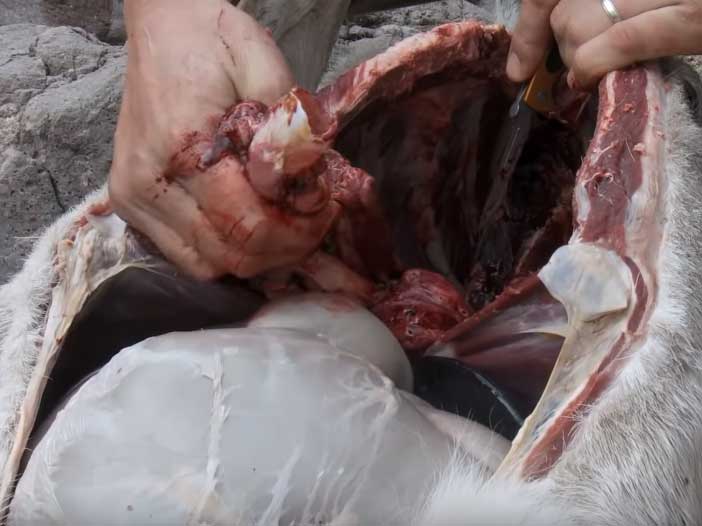
Above the lungs and heart, you will find the windpipe. With one hand reach out, grab it and pull it towards you. Then with your knife reach out and cut it and free it from the entrails.
Step Eight: Remove The Entrails
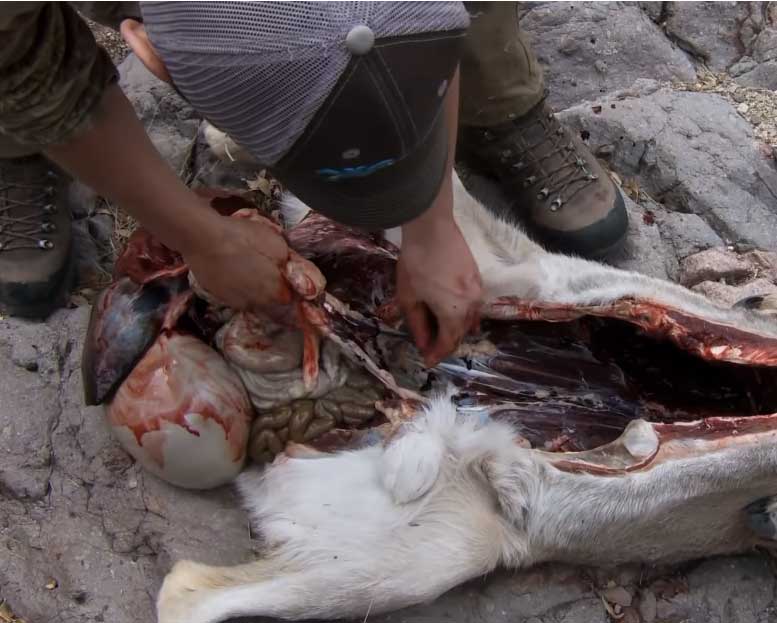
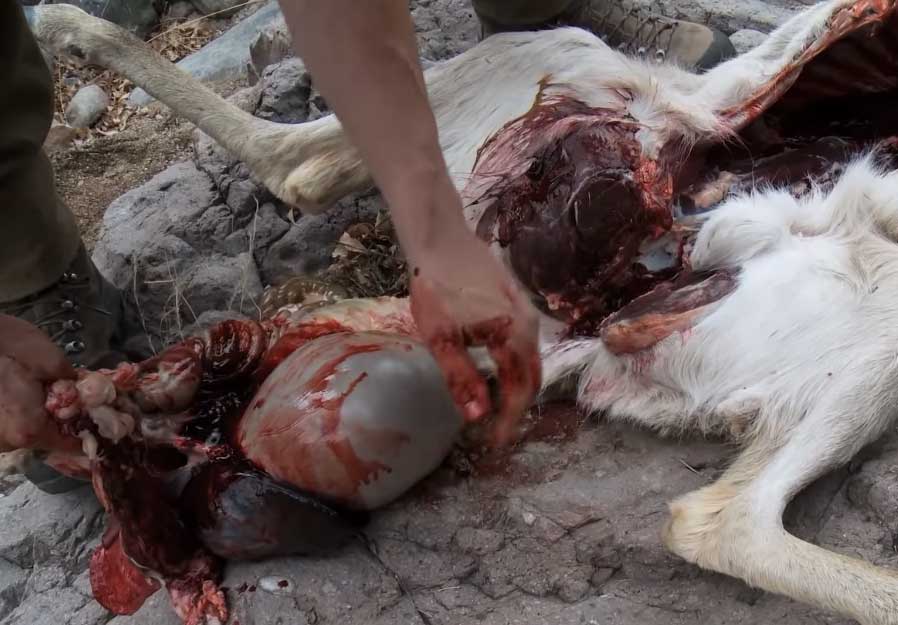
Now that you have cut the diaphragm cut the anus and freed the windpipe you can remove the entrails. The insides of the animal can be removed with one long pull on the windpipe. These should include the bladder, stomach, liver, heart, and intestines.
Step Nine: Cleaning
After all this messy work you will need to know how to clean a deer. First place the deer with the open cavity facing downwards to allow the blood to flow. Obviously, you will need to ensure that dirt and other debris do not come in contact with the meat.
After The Field Dressing Of A Deer
The dirty work does not end there though as there is more to be done before you can get to enjoy your kill. Now firstly, you must drag your kill to your camp or home, whichever is nearest.
When you get to camp or home, the first thing to do is to hang up the deer. This is to allow the blood to drain. Let the blood drain for about ten minutes. Also if you are doing this out in the wild take note of any regulations on the handling of carcasses.
Some states have rules on how to handle carcasses and the waste that is left. Also, do not leave unwanted parts lying around as they can attract predators.
The other thing to do is to place the heart and liver in a plastic bag. There are those who love a well-cooked deer liver or heart. And if you are one of them you will need to keep the two neatly packed in a plastic bag.
Most of the entrails you remove such as the colon will need to be disposed of. To do this, you can either bury them in the ground or place them in a large trash can. If you decide to bury them, you will need to dig a sufficiently big hole.
Predators can smell blood and animal parts from very far. So a shallow pit will again attract predators, which is not what you want.
There is also the question of how to process a deer. For health reasons, it is advisable to keep the carcass stored below 40 degrees. The cool temperatures will keep the bacteria at bay while your prepare to process the meat.
Some people will rinse the body cavity with water, but this is seldom necessary. However, if the inside of the cavity is contaminated with dirt, hair, or feces, then this will be necessary. Rinse the inside of the cavity with clean water.
Another thing you can do is prop the body cavity with sticks to allow for air circulation. If you decide on processing the meat yourself, it will be another task. That will involve filleting out the back straps, tenderloins, and neck meat.
Conclusion
As with everything else practice makes perfect. So the more deer you down, the more practice you will have on how to field dress a deer. Also, the process is not as complicated as you may think. With the right tools, you can complete the gutting process within minutes. Obviously, even for pros, it takes more than a minute to field dress a deer. In conclusion, field dressing a deer is something you will have to learn over time.
About The Author:
Lake Streeter, A Gun enthusiast, and loves to hunt in the middle of the wood. Always check the latest hunting gears out in the market and try to share his honest opinion with the audience in Tarheel3Gun.
